Video calls demand balanced lighting that serves two competing needs: illuminating your face so the camera renders you clearly, and preventing bright sources from reflecting into your screen and washing out text, icons, and participants' faces. When a light is positioned incorrectly, you may appear well-lit on camera but struggle to read your own display - or conversely, keep the screen legible but appear dim and shadowed to others.
This challenge intensifies with glossy laptop screens and monitors placed near windows or desk lamps. Reflections create bright patches that obscure content during meetings, presentations, and collaborative work sessions. At the same time, insufficient facial lighting forces the camera to boost gain, introducing noise and flattening detail.
The solution lies in deliberate placement and angle control of external light sources - key lights, fill lights, and bias lights - rather than relying on overhead fixtures or screen coatings. Overhead lighting typically casts downward shadows and contributes to glare when positioned in front of you. Monitor treatments like anti-glare films address surface reflections but do nothing to improve how you appear on camera.
This guide focuses exclusively on how to position, angle, and control the intensity of external lights to achieve clear facial visibility without introducing reflections that interfere with screen readability. You will learn the geometry that keeps light out of the monitor's reflection zone, the role of diffusion and distance in managing brightness, and practical methods to verify that your setup works for both camera and screen simultaneously.

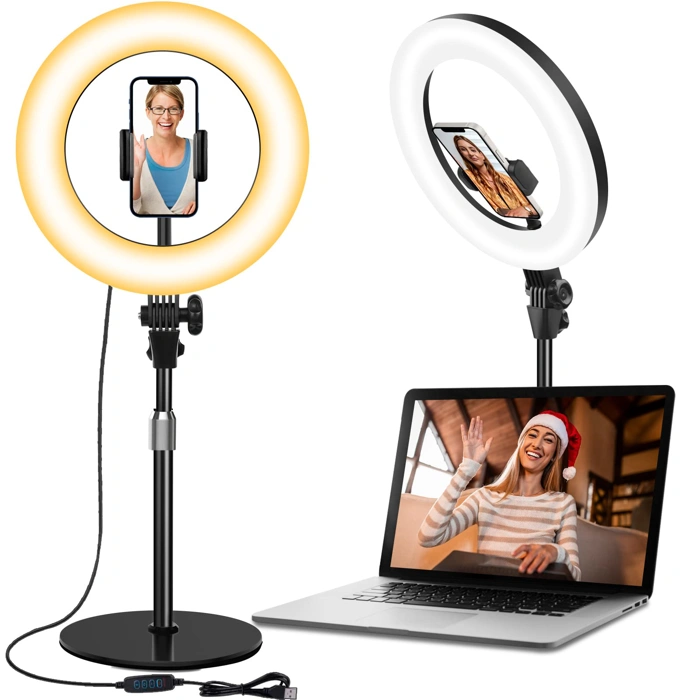
ALTSON 10in LED Video Conference Desk Ring Light with Phone Holder
The ALTSON 10in LED Video Conference Desk Ring Light combines a 10-inch ring light with an integrated phone holder on a desk stand, designed for users who need both illumination and device mounting in a single unit. The compact diameter fits on desks where space is limited, while the adjustable arm allows you to position the light at different heights and angles relative to your face and screen.
Brightness is adjustable, letting you dial down intensity to reduce the risk of reflections bouncing off your monitor. The smaller 10-inch diameter produces less total light output than larger ring lights, which can be an advantage when working close to your screen - softer fill light means fewer hot spots on glossy surfaces. The desk stand keeps the footprint small, though this also means the light remains relatively close to your centerline unless you angle the arm significantly to one side.
The built-in phone holder positions your device inside the ring, which works well for mobile video calls where the camera and light need to align. For laptop or external webcam setups, you'll place the ring light off to the side or behind your monitor, using the adjustable arm to aim the light toward your face while keeping the holder unoccupied. The stand's range of motion determines how far you can offset the light from your screen's center line; desks with shallow depth may limit your ability to create the angle needed to avoid direct reflections.
Ease of adjustment depends on the arm's tension and joint design. A stand that holds position without constant re-tightening makes it simpler to find the sweet spot where your face is lit but your screen remains glare-free. If the arm drifts or the base feels light, you may need to stabilize it with desk items or reposition frequently.
This ring light suits users who prioritize a single-device solution for phone-based video calls or who have limited desk real estate. If your primary concern is eliminating glare on a laptop or desktop monitor, confirm the stand's arm allows enough lateral and vertical travel to position the light well off-axis from your screen.
- ✅ 10-inch diameter fits smaller desks
- ✅ Adjustable brightness helps control reflections
- ✅ Integrated phone holder for mobile video calls
- ✅ Compact footprint
- ⚠️ Limited offset range on shallow desks
- ⚠️ Smaller ring produces less total light output
- ⚠️ Stand stability depends on arm tension and base weight
10.5'' Desktop Ring Light with Stand and Phone Holder for Video Conferencing
The 10.5'' Desktop Ring Light with Stand and Phone Holder offers a compact, desk-friendly setup for video calls. With a 10.5-inch diameter ring, this unit provides even illumination without requiring a large footprint. The integrated stand and phone holder let you position your device directly in the center of the light, which works well for smartphone-based video conferencing.
At $34.59, this ring light sits in the budget-friendly range for desktop lighting. The stand design allows you to adjust height and angle, making it possible to position the light at the recommended multiple degree offset from your screen to minimize glare. The phone holder adds convenience if you frequently join calls from a mobile device, keeping your hands free and your camera stable.
Stability depends on the base design and the weight of your phone. Lighter smartphones will stay secure, but heavier devices or frequent repositioning may require careful balancing. The stand's height range will determine whether you can achieve the ideal angle for your desk setup - shorter stands may limit placement options if your monitor is tall or your desk surface is low.
This model carries a 4.3/5 rating, reflecting generally positive feedback on ease of use and light quality. The diameter is smaller than larger studio rings, so expect softer, more localized light that works best when positioned close to your face. For video calls where you need even facial lighting without harsh shadows, this size is practical without overwhelming your workspace.
Consider this ring light if you prioritize a simple, all-in-one setup with integrated phone mounting. If you need more flexibility to position lights independently of your camera, or if you work primarily from a laptop or desktop monitor, a separate stand or clip-on light may offer better control over glare and angle.
- ✅ Compact 10.5-inch diameter fits smaller desks
- ✅ Integrated phone holder keeps device stable and centered
- ✅ Adjustable stand allows 30 - 45 degree offset positioning
- ✅ Budget-friendly at $34.59
- ⚠️ Smaller ring size provides less light coverage than larger models
- ⚠️ Stability may vary with heavier smartphones
- ⚠️ Height range may limit ideal placement for taller monitors
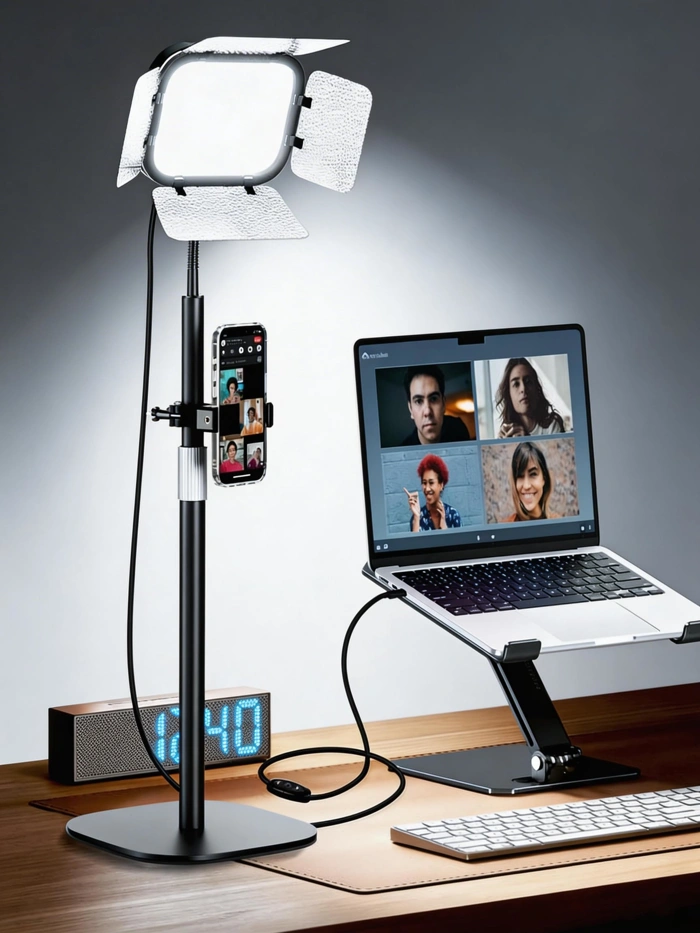
EMART Desk Ring Light with Flexible Gooseneck for Video Conferencing
The EMART Desk Ring Light with Flexible Gooseneck offers a mounting solution built around precise angle control. The gooseneck arm lets you tilt and rotate the ring light in almost any direction, making it easier to direct light at your face while steering it away from your screen. That flexibility is the main advantage when you're trying to eliminate reflections on glossy displays.
The unit includes both a desk clamp and a weighted base, so you can choose whichever attachment works better for your workspace. The clamp saves desk surface area, though it does require a suitable edge to grip. Once mounted, the gooseneck holds its position without constant readjustment, though heavier tugs during initial positioning can take a moment to settle.
The ring design provides even illumination across your face, reducing shadows that single-point lights often create. Brightness and color temperature are adjustable, which helps you match ambient room light and avoid the harsh contrast that can cause eye fatigue during long calls. The controls sit on a wired remote, keeping them within reach without adding clutter to the light head itself.
Setup does take more time than simpler clip-on lights. You'll need to experiment with gooseneck placement, height, and tilt to find the sweet spot where your face is well-lit but the screen stays glare-free. The trade-off is positioning precision: once dialed in, the flexible arm stays put and you can recreate the same setup for every call. If you frequently move between workspaces or prefer plug-and-go simplicity, the extra adjustment steps may feel like overhead. But for a fixed desk where you want repeatable, reflection-free lighting, the gooseneck design delivers control that rigid mounts can't match.
The EMART ring light is priced at $36.99 and carries a 4.4 out of 5 rating.
- ✅ Flexible gooseneck arm allows precise tilt and rotation to avoid screen reflections
- ✅ Includes both desk clamp and weighted base for mounting flexibility
- ✅ Adjustable brightness and color temperature to match ambient light
- ✅ Ring design provides even facial illumination with reduced shadows
- ⚠️ Initial setup and positioning takes more time than simpler clip-on lights
- ⚠️ Desk clamp requires a suitable edge to grip securely
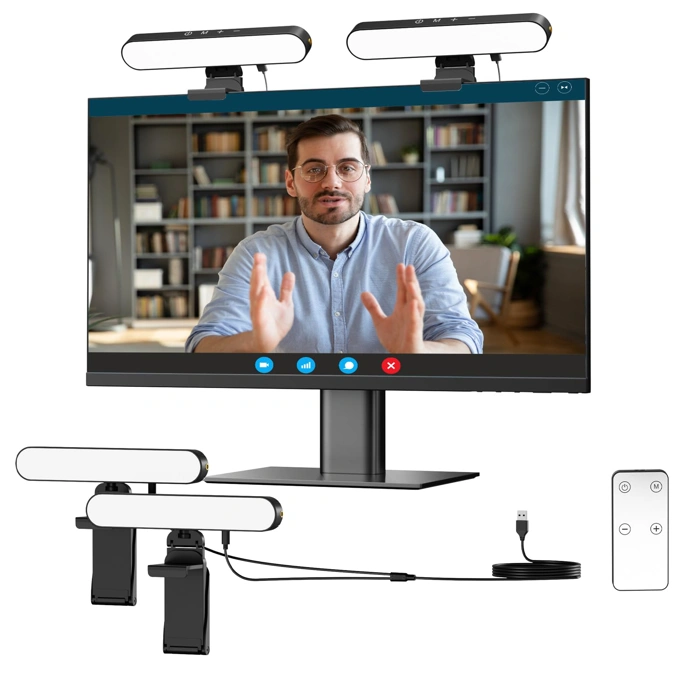
Takerers Video Conference Webcam Light with Remote Control (2-Pack)
The Takerers Video Conference Webcam Light ships as a two-pack with remote controls, designed to clip directly onto the top edge of your monitor. This placement puts the light source very close to your webcam, which can help illuminate your face evenly when desk space is tight or when side-mounted ring lights would interfere with a dual-monitor setup.
Because the light sits just above your screen, tilting it downward is essential. When left flat or angled toward the display, the beam reflects off the glass and creates bright hotspots that make text and UI elements difficult to read during calls. Angling the fixture down toward your face instead of straight ahead reduces backscatter onto the screen while keeping your upper body and face well lit.
The included remote control lets you adjust brightness without reaching up to the monitor, which is useful during live meetings when you need to compensate for changing daylight or when the initial setting proves too bright once the call begins. The two-pack configuration works well if you run dual monitors and want symmetrical fill light from both sides, though each unit must be angled carefully to avoid crossing beams that amplify glare.
This clip-on design suits users with minimal desk real estate or those who cannot position a ring light or desk lamp off to the side. The tradeoff is proximity: light mounted this close to the screen requires more attention to angle and intensity than fixtures placed farther away. If you have room for a side-mounted lamp or ring light on an articulating arm, those options typically offer easier glare control because the light source sits outside the reflection zone of your display.
- ✅ Two-pack configuration supports dual-monitor setups
- ✅ Remote control allows brightness adjustment during calls
- ✅ Clips directly to monitor, no desk footprint required
- ✅ Close placement provides even illumination when space is limited
- ⚠️ Proximity to screen increases glare risk if not angled downward
- ⚠️ Requires careful tilt adjustment to avoid reflections
- ⚠️ Dual units can create crossing beams that amplify hotspots
Who This Setup Is For
This lighting setup is designed for remote professionals who spend significant time on video calls and need to balance two competing priorities: appearing clearly on camera while keeping their screen readable throughout the meeting.
If you frequently present slides, reference documents, or collaborate on shared screens during calls, you've likely encountered the core problem: lights that make your face visible often bounce off your monitor, creating glare that forces you to squint or tilt your screen at awkward angles. Conversely, dimming the lights to reduce reflections can leave you poorly lit and difficult for colleagues to see.
This guide assumes a typical remote work environment: a single monitor positioned at arm's length, a webcam mounted at or just above the top of the screen, and a standard desk depth of roughly 24 to 30 inches. You're working in a room where you control ambient light to some degree - whether that's an office, a corner of a bedroom, or a sectioned-off area of a shared space.
The techniques work best when your desk faces away from windows or when you can manage natural light with blinds or curtains. If your workspace involves multiple monitors, ultra-wide curved displays, or unusual desk configurations, the core principles still apply, but you may need to adapt placement distances and angles to account for additional reflective surfaces.
This is not a guide for content creators seeking studio-quality production lighting or for occasional users who can tolerate inconsistent lighting. It's for anyone who needs a repeatable, functional setup that eliminates screen glare without sacrificing visibility during daily work calls.
What Causes Screen Glare From Lighting
Screen glare during video calls happens when light travels directly into your monitor and reflects back toward your eyes. The most common culprit is a light source positioned directly behind your webcam or in line with the screen surface. When light hits the glass or matte finish at certain angles, it creates specular reflections - bright spots or washed-out areas that make text and video unreadable.
The problem isn't always about how bright the light is. A moderately bright lamp placed in the wrong position will cause more glare than a powerful ring light angled correctly. High-risk positions include any fixture mounted on top of your monitor, a window directly behind your screen, or a desk lamp sitting at the same height as your display and aimed forward.
Overhead ceiling lights also create glare when they sit in the reflection zone. If you draw an imaginary line from your eyes to the center of your screen and extend it behind the monitor, any light source near that line will likely bounce straight back. Glossy screens amplify this effect, but even matte displays show reduced contrast and readability when light strikes them head-on.
Understanding these mechanics helps you avoid the most common setup mistakes. Moving a light source just a few degrees off-axis or raising it above the reflection zone often eliminates glare without requiring dimmer switches or diffusion materials. The goal is to keep light paths away from the mirror-like angles between your screen surface and your viewing position.
Brightness and Color Temperature Adjustments
Once your lights are positioned, brightness and color temperature determine whether you look natural or washed out - and whether your screen stays legible. Start every key light at 50% output and watch your camera preview. Increase intensity in small steps until shadows under the chin and around the eyes soften enough that facial features read clearly, then stop. Over-brightening floods the frame with light that bounces off your screen and keyboard, creating the hot spots that make text illegible.
Color temperature - measured in Kelvin - affects skin tone and ambient mood. Lights rated between 4000 K and 5000 K produce a neutral white that matches daylight through a window, so your face appears neither yellow nor blue. Warmer tones below 3500 K lean orange and make video feel like indoor evening light; cooler tones above 5500 K push blue and can look clinical. Consistency matters more than the exact number: if you use two lights, set both to the same Kelvin value so one side of your face does not shift warmer than the other.
When glare persists even after repositioning, your first instinct may be to move the light farther from your face. Distance does lower intensity, but it also flattens modeling and widens the spill across walls and furniture. Dimming the fixture instead keeps the angle and shadow quality intact while reducing the photons that reach reflective surfaces. Most LED panels and ring lights include a dial or app slider; reduce output by 10 - 20% at a time and check the screen in your camera preview. If your light lacks a dimmer, place a sheet of white diffusion fabric or tracing paper over the front to cut intensity without changing color.
Record a ten-second test clip after each adjustment. What looks acceptable in a live preview can reveal banding, flicker, or color shifts when you play back the file. Make a note of the brightness percentage and Kelvin setting that works, so you can return to that baseline every time you sit down for a call.
Choosing the Right Light Format
The format of your light source affects both how evenly you're illuminated and how much control you have over glare. Ring lights create a circle of even brightness around your camera lens, which produces soft, balanced fill light on your face and minimal shadows. They work best when positioned directly behind your monitor or mounted on a tripod at face height. The main trade-off is desk space: a ring light requires a footprint of at least eight to twelve inches in diameter, and the stand or mounting arm needs clearance. If your desk is already crowded with monitors, keyboards, and peripherals, a ring light can feel bulky.
Clip-on webcam lights attach directly to the top edge of your monitor or laptop screen, keeping the light source as close to the camera as possible. This placement reduces under-eye shadows and keeps your setup compact. However, because the light sits so close to your screen, any glossy surface in the background - including the screen itself - becomes a glare risk. You'll need to angle a clip-on light downward by ten to fifteen degrees and keep brightness below 80 percent to avoid reflections bouncing back into the camera. Clip-on models also tend to offer narrower beam angles, which means less spill light to illuminate your surroundings but more concentrated brightness on your face.
Desk lamps with adjustable arms give you the most placement flexibility. You can swing them left or right, raise or lower the head, and reposition them between calls without moving your entire setup. This makes them practical if you share a workspace or switch between video calls and other tasks throughout the day. The downside is that desk lamps require manual adjustment each time you sit down, and many consumer models use warm-toned bulbs that shift your skin tone toward yellow or orange on camera. Look for lamps labeled daylight or 5000K to 6500K if you choose this route, and plan to angle the head so it points at your face from above rather than straight on.
Each format has a role depending on your desk layout and how often you adjust your setup. Ring lights suit dedicated video call stations with room to spare. Clip-on lights work for laptops and tight desks where portability matters. Desk lamps fit workflows that shift between video and other work, as long as you're willing to reposition the arm each session.
Common Mistakes to Avoid
Even a well-chosen light can create glare if positioned poorly or used at the wrong settings. The following mistakes appear in countless home office setups, and each has a straightforward fix that will improve screen readability without requiring new equipment.
Placing the light directly behind the webcam is the most common error. A ring light or desk lamp centered above or beside the monitor sends brightness straight into the screen surface, creating a bright halo or hotspot exactly where you need to read chat messages or see shared documents. Move the light to either side of the monitor at a 30 - 45° horizontal angle, so the beam crosses your face without intersecting the screen.
Running desk lamps and LED panels at maximum brightness without testing the result on camera overwhelms both your face and the screen. High output may look acceptable to your eye, but webcams compress dynamic range, turning bright areas into blown-out patches and causing reflections to spread across glossy monitor coatings. Start at 50 percent output, join a test call or open your camera preview, and increase brightness only until your face is evenly lit. Stop before reflections become visible on the screen.
Ignoring monitor tilt angle leaves the screen surface aimed directly at your key light or a nearby window. Most monitors tilt backward 5 - 15°, and that small angle change can redirect a ceiling fixture's reflection out of your sight line. Tilt the top of the monitor back slightly, check the screen for reflections, then adjust in small increments until the glare disappears. If you tilt too far, text becomes harder to read, so find the minimum angle that clears the reflection.
Failing to account for window light changes throughout the day means your glare-free morning setup becomes unusable by afternoon. Sunlight intensity and angle shift as the day progresses, and a monitor positioned to avoid direct light at 9 a.m. may catch strong reflections by 2 p.m. Use a roller shade or vertical blind to control incoming light during peak glare hours, or rotate your desk 90° so windows sit to your side rather than in front of or behind you.
Assuming one light position works for all monitor sizes ignores the geometry of reflections. A 24-inch display has a smaller reflective surface and can often sit between two side lights without glare, while a 32-inch ultrawide presents a much larger target for stray light. Larger screens require wider light placement angles and more attention to vertical positioning. Test each screen size separately, and be prepared to move lights farther out or raise them higher as monitor dimensions increase.
Each of these mistakes has a mechanical cause and a mechanical solution. Adjust position, test the result on screen, and make incremental changes rather than attempting a complete redesign. Small shifts in angle, brightness, or monitor tilt will resolve most glare problems without requiring additional purchases.
Testing and Fine-Tuning Your Setup
Once your lights are in position, run a deliberate test routine to confirm the setup works under real-world conditions. Start a video call or record a short clip on your usual platform, then review the footage while seated at your desk. Check that your face is evenly lit, with no harsh shadows under the chin or across one side, and that the screen remains clearly visible without bright spots or glare reflecting off the panel.
If you notice reflections or uneven coverage, adjust the light angle in small increments - five degrees at a time - and record another clip after each change. This methodical approach makes it easier to isolate the adjustment that solves the problem without overshooting. Pay attention to the fill light as well; if one side of your face appears too bright or washed out, dial down the intensity or move that light slightly farther away.
Next, share your screen during a test call or recording and watch for any new reflections that appear when white slides or bright documents occupy the display. Bright content can create glare that wasn't visible with a darker desktop, so confirm visibility across a range of screen tones. Adjust the key light angle or reposition the monitor if needed to eliminate these secondary reflections.
Once you achieve a setup that delivers even facial lighting and a glare-free screen, mark or photograph the final light positions. This reference makes it simple to restore the configuration if a light is moved during cleaning or repositioned temporarily. Schedule a quick re-check whenever you shift furniture, rotate the monitor, or change the desk layout, since even minor changes in screen angle or seating position can reintroduce reflections that the original setup eliminated.
Final Takeaway
The most effective way to eliminate glare from your video call screen is to position your lights at a 30 - 45 degree angle to either side of your camera, rather than placing them directly behind your monitor or directly overhead. This offset placement keeps light off the screen surface while still illuminating your face evenly.
Expensive lighting kits are not required. Small adjustments to the angle and brightness of your existing desk lamp or window light will produce a more noticeable improvement than adding more equipment. Start by angling your primary light source away from the screen, then fine-tune the distance and dimmer settings until you see no reflection in your display.
Once you find a configuration that works, mark the light positions or take a photo of the setup. A one-time investment of fifteen minutes in thoughtful placement will improve every video call you take, reducing eye strain and making on-screen content readable without constant repositioning.
Focus on consistent, repeatable placement rather than perfection. If glare reappears when you move furniture or change your seating position, return to the 30 - 45 degree guideline and adjust from there. The goal is a reliable setup that supports clear communication without technical distractions.
Key Placement and Angle Rules
- Position light source 30 - 45 degrees off-axis from the monitor center line
- Keep light height at or slightly above eye level to avoid unflattering shadows
- Place light 1.5 - 3 feet from your face, not directly behind the webcam
- Tilt light downward 10 - 15 degrees to minimize direct screen contact
- Use diffused or indirect light rather than narrow spotlight beams
- Test placement by checking screen reflection before joining calls