Laptops are portable by design, but using one for hours at a time at your home desk creates predictable comfort problems. The built-in screen sits too low, forcing your neck into a forward bend. The integrated keyboard positions your hands too high and too far forward, creating wrist tension and shoulder fatigue. Over extended sessions, these postural compromises add up to neck stiffness, back discomfort, and eye strain.
This guide walks through a practical ergonomic laptop setup checklist for a home office. You'll learn how to adjust screen height, position external peripherals, and arrange your desk to support neutral posture during sustained work. The focus is on fit, stability, and comfort - not expensive equipment or complex installations.
This checklist is most useful for anyone spending three or more hours daily on a laptop at a fixed desk. If you rotate between rooms or work in short bursts, many of these adjustments may not be necessary. We will not cover standing desk converters, articulating monitor arms, or detailed office chair selection - those topics deserve separate attention. Instead, this guide assumes a standard sitting desk and concentrates on the laptop itself and the core peripherals that change how you interact with it.
The goal is straightforward: reduce the angles and reaches that cause strain, and make the decision logic clear so you can adapt the setup to your space and budget.
Who This Setup Is For
This checklist is designed for remote workers, hybrid professionals, and freelancers who use a laptop as their primary work device at a dedicated home office desk. If you spend four or more hours each day on video calls, writing, spreadsheets, or design work from the same workspace, these adjustments apply to you.
Common signals that your setup needs attention include neck stiffness after back-to-back meetings, wrist soreness by midday, shoulder tension from reaching forward, and eye fatigue from screen glare or squinting at small text. You may also notice yourself leaning forward, hunching to see the screen, or propping your wrists on hard edges.
This guide assumes you work from a consistent location with room for external peripherals. It is not intended for users who hot-desk, move between coffee shops, or need a fully portable setup that fits in a backpack. If portability is your priority, a fixed monitor stand or separate keyboard may not be practical. The checklist focuses on creating a stable, repeatable workspace that supports neutral posture over long sessions.
Whether you transitioned to remote work recently or have worked from home for years, small adjustments to monitor height, keyboard placement, and lighting can reduce cumulative strain without requiring a full office redesign.
What Matters Most in a Laptop Workspace
A typical laptop forces a choice between two bad positions: place the screen at a comfortable viewing height and your hands reach upward to type, or keep your hands level and your neck bends down to see. Both create strain - one in your shoulders and wrists, the other in your neck and upper back. An ergonomic laptop workspace breaks this compromise by treating the three core elements independently.
Screen position is the first priority. The top of your display should sit at or slightly below eye level when you sit upright with relaxed shoulders. This neutral head position keeps the weight of your skull balanced over your spine rather than cantilevered forward. When the screen is too low, every degree of neck flexion multiplies the effective load on cervical muscles and discs. A laptop screen, by design, sits far below this target height when placed on a desk.
Keyboard and wrist posture come next. Your elbows should rest near 90 degrees, with forearms roughly parallel to the floor and wrists in a straight line with your forearms - not bent up, down, or to either side. A laptop keyboard forces your wrists into extension if the screen is raised, or forces your neck into flexion if the laptop stays flat. An external keyboard breaks this link, letting you position each element where it belongs.
Input device placement completes the setup. A mouse or trackpad should sit close enough that you don't reach forward or out to the side, keeping your upper arm near your torso. Repetitive reaching, even by a few inches, loads the shoulder and forearm over thousands of movements each day. Compact keyboards and thoughtful desk layout reduce this reach; vertical or trackball designs can further reduce forearm rotation and gripping force.
These three elements - screen height, keyboard position, and input device placement - form the mechanical foundation of an ergonomic laptop workspace. Address all three, and the built-in compromises of a laptop disappear. Ignore any one, and postural strain will migrate to whichever joint or muscle group absorbs the mismatch.
How to Choose Peripherals and Accessories
Choosing the right peripherals transforms a cramped laptop into a comfortable workstation. The decisions you make depend on how you work, how much space you have, and where you want to spend your budget.
Start with your work style. If you move between rooms or pack up daily, lightweight wireless peripherals and a simple fixed-height stand offer portability without sacrificing posture. If your laptop stays in one spot, wired devices eliminate battery anxiety and a heavier adjustable stand provides finer control over screen height.
Desk space dictates layout. Compact keyboards without number pads free up room for mouse movement and let you keep the mouse closer to your body, reducing shoulder reach. Vertical mice take up slightly more horizontal space but orient your forearm in a neutral handshake position, which some users find more comfortable during long sessions. Traditional mice are flatter, easier to share, and familiar if you switch between devices.
Cable management matters more than it seems. Wireless setups look cleaner and let you reposition quickly, but you'll need to charge or replace batteries. Wired peripherals stay powered and responsive, but require desk clips, cable sleeves, or routing channels to keep cords from tangling or pulling your keyboard when you adjust position.
Budget ceiling shapes the trade-offs. A basic external keyboard and mouse pair costs less than a single adjustable monitor arm, but together they solve the two biggest laptop ergonomic problems: low screen height and cramped typing posture. Prioritize the keyboard first if you type heavily, the stand or arm first if you read or reference documents most of the day, and the mouse upgrade if you work in design, data, or other pointer-intensive tasks.
Adjustability adds cost but pays off if your chair height changes, you share the desk, or you alternate between sitting and standing. Fixed-height stands are lighter and cheaper; adjustable arms and risers let you dial in exact angles. Choose fixed if your setup is stable and solo, adjustable if conditions vary.
Try before committing when possible. Keyboard key travel, mouse size, and stand stability all affect comfort, and preferences vary. If you can't test in person, buy from retailers with flexible return policies and give each peripheral a full work week before deciding.
Common Mistakes to Avoid
Even with the right equipment, small setup errors can undermine your ergonomic goals. Recognizing these mistakes early helps you adjust before discomfort becomes a daily pattern.
Using a laptop stand without an external keyboard is one of the most common missteps. Elevating the screen to eye level is essential for neck comfort, but if you continue typing on the laptop's built-in keyboard, your shoulders and wrists now sit in an awkward, raised position. The stand solves one problem but creates another. Always pair a laptop stand with a separate keyboard positioned at elbow height.
Positioning the screen too high or too low forces your neck into sustained flexion or extension. If the top of the screen sits above eye level, you tilt your head back; if it sits below, you hunch forward. Both positions increase neck and upper-back strain over time. The top third of the screen should align with your natural, forward gaze when sitting upright.
Placing the keyboard too far forward causes you to reach, which pulls your shoulders out of alignment and strains the upper back. Your keyboard should sit close enough that your elbows remain near your torso, forming a 90-degree angle or slightly more. If you find yourself leaning forward to type, pull the keyboard closer.
Ignoring chair height relative to desk height disrupts the entire chain of alignment. If your chair is too low, your wrists bend upward to reach the keyboard; too high, and your feet dangle or your thighs press into the desk edge. Adjust your chair so your feet rest flat, thighs are parallel to the floor, and your keyboard sits at or just below elbow height.
Discomfort signals are your most reliable diagnostic tool. Persistent neck tension suggests a screen-height issue. Shoulder or upper-back tightness often points to keyboard placement or monitor distance. Wrist pain may indicate poor keyboard angle or chair height. Pay attention to where fatigue appears during your workday, and use it to guide small adjustments. Ergonomics is not a one-time setup - it's an ongoing process of observation and refinement.
Testing and Adjusting Your Setup
A great ergonomic setup on paper may feel different once you actually work in it. Set aside 30 to 60 minutes to use your new configuration for typical tasks - email, document editing, video calls - and pay attention to how your body responds.
During this test session, watch for specific feedback signals. Neck tension or the urge to tilt your head forward often means your screen is too low or too far back. If your wrists rest against the desk edge or you feel pressure on your forearms, your keyboard may be too high or your chair armrests poorly positioned. Eye strain, dry eyes, or squinting usually indicate the monitor is too close, too far, or poorly angled relative to overhead lighting.
Make one adjustment at a time. Raise the laptop stand by an inch, shift the keyboard closer, or lower your chair seat slightly. Work for another 15 minutes and reassess. Small, incremental changes help you isolate what actually improves comfort versus what creates new problems.
Expect to iterate over several days. Your muscles and joints need time to adapt to a new posture, especially if you've been working in a poor setup for months. What feels slightly awkward on day one may become neutral by day three. Conversely, a setup that feels fine initially may reveal discomfort after a full morning of work.
Keep a simple log if helpful: note the date, the change you made, and how your neck, shoulders, wrists, and eyes felt after a few hours. This record makes it easier to identify patterns and fine-tune positioning without second-guessing earlier adjustments.
The goal is not immediate perfection but a setup that reduces strain and supports sustainable work habits. Trust the signals your body sends, adjust thoughtfully, and give each change enough time to prove itself.
Final Takeaway
The fundamental principle of an ergonomic laptop setup is simple: your screen needs to be at eye level, and your keyboard needs to be at elbow height. Because a laptop locks these two elements together, achieving both simultaneously is impossible without external peripherals.
This checklist gives you a repeatable way to audit your workspace. Walk through each category - monitor height, keyboard and mouse placement, seating posture, lighting, and desk layout - whenever you change your work location, adjust your furniture, or notice new discomfort in your neck, shoulders, wrists, or back.
Ergonomics is not a one-time fix. Work patterns shift, tasks change, and bodies adapt. A setup that feels fine during short email sessions may cause strain during four-hour video calls or full days of documentation work. Revisit this checklist after any significant change in your routine or equipment.
If you're starting from scratch, begin with one peripheral. A laptop stand or external keyboard will unlock the biggest improvement by separating screen height from input position. From there, add a mouse, adjust your chair, and refine lighting. Incremental changes are easier to sustain than overnight overhauls, and they let you learn what makes the most difference for your specific tasks and body.
Your home office setup should support the work you do, not work against it. Use this checklist as a tool to build that support, step by step.
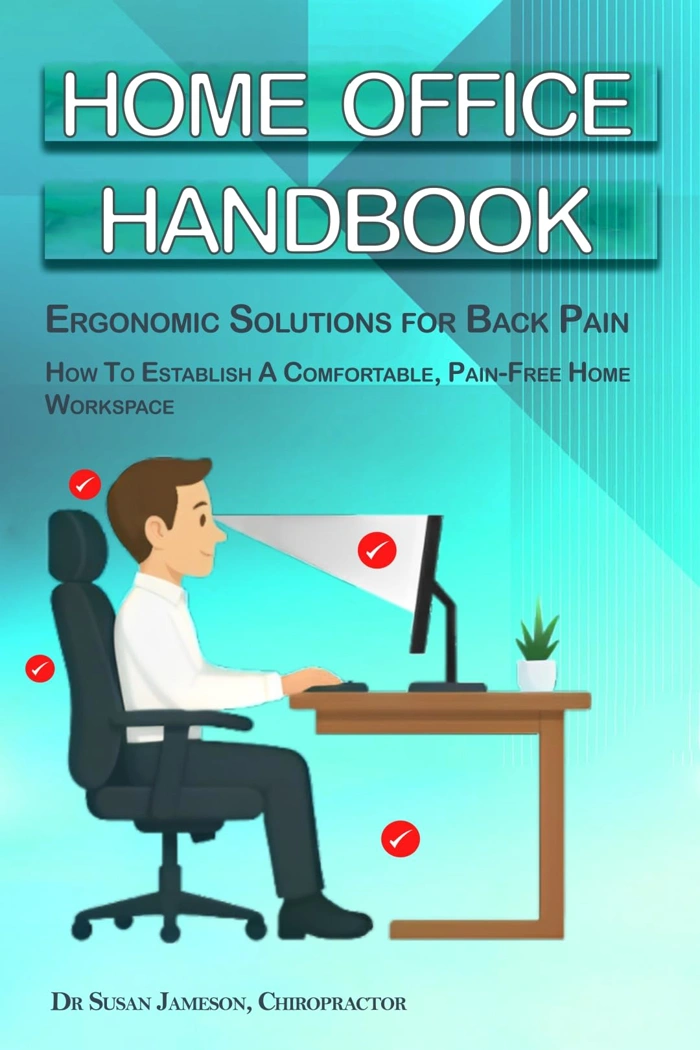
Home Office Handbook: Ergonomic Solutions for Back Pain (Ergonomic Wellness Series 1)
The Home Office Handbook: Ergonomic Solutions for Back Pain is a free resource available on Amazon that provides background on ergonomic principles for home office workers. With a 4.7 rating, it offers supplementary reading for anyone setting up or refining a laptop workspace.
This handbook is positioned as optional learning material rather than a required tool. It covers ergonomic concepts that complement the practical setup steps in this checklist, making it useful for readers who want deeper context on posture, equipment choices, and workspace layout.
Because it's free and available digitally, it's an accessible starting point for understanding why monitor height, keyboard placement, and chair adjustments matter. It doesn't replace hands-on adjustments to your own workspace, but it can help clarify the reasoning behind common ergonomic recommendations.
If you're new to ergonomic setups or looking for background to share with colleagues or family members working from home, this handbook provides a low-commitment entry point. For readers focused solely on actionable checklist steps, the rest of this guide covers the essential setup tasks without requiring additional reading.
- ✅ Free to access
- ✅ 4.7 rating from readers
- ✅ Provides background on ergonomic principles
- ✅ Useful context for equipment and posture decisions
- ⚠️ Supplementary reading, not a setup tool
- ⚠️ Does not replace hands-on workspace adjustments
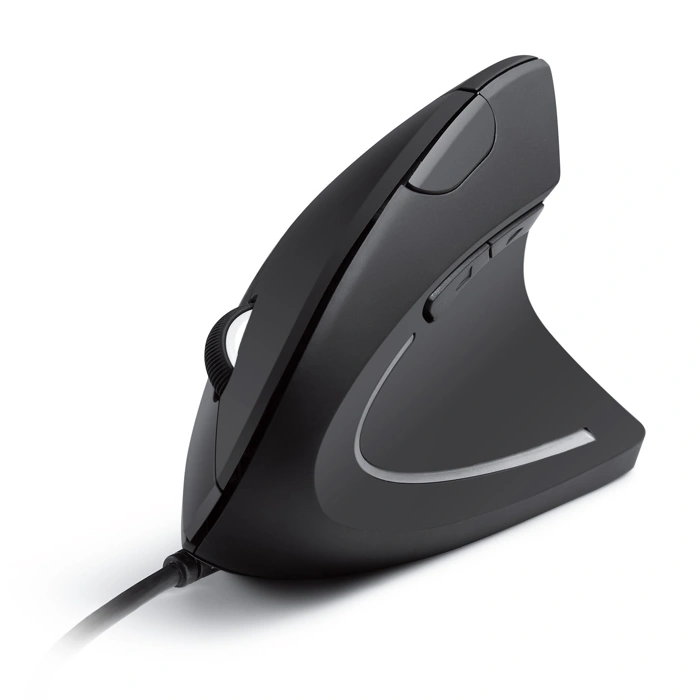
Anker USB Wired Ergonomic Vertical Mouse
The Anker USB Wired Ergonomic Vertical Mouse offers an affordable entry point for anyone curious about vertical grip orientation. Priced at $16.99 and rated 4.4 out of 5, it removes the cost barrier that keeps many users from testing whether a vertical design suits their hand and workflow.
The wired USB connection delivers consistent, plug-and-play reliability - no batteries to charge, no Bluetooth pairing steps, and no wireless dropouts during video calls or detailed work. The vertical orientation positions your forearm in a neutral, handshake-like posture that reduces the pronation typical of traditional flat mice.
This simplicity comes with tradeoffs. You sacrifice wireless freedom, so cable routing becomes part of your desk setup, and there are no programmable buttons or adjustable DPI profiles for users who customize sensitivity or map macros. If your priority is testing vertical posture without upfront investment or learning whether this grip reduces forearm tension during long sessions, the Anker delivers that experiment at minimal risk. If you later decide vertical orientation works for you, higher-priced wireless models with tunable features remain an option; if not, you've spent less than the cost of lunch to find out.
- ✅ $16.99 price point lowers the barrier to trying vertical orientation
- ✅ Wired USB connection provides plug-and-play reliability with no charging
- ✅ Vertical grip positions forearm in a neutral, handshake-like posture
- ⚠️ Cable routing required - no wireless freedom
- ⚠️ No programmable buttons or adjustable DPI settings
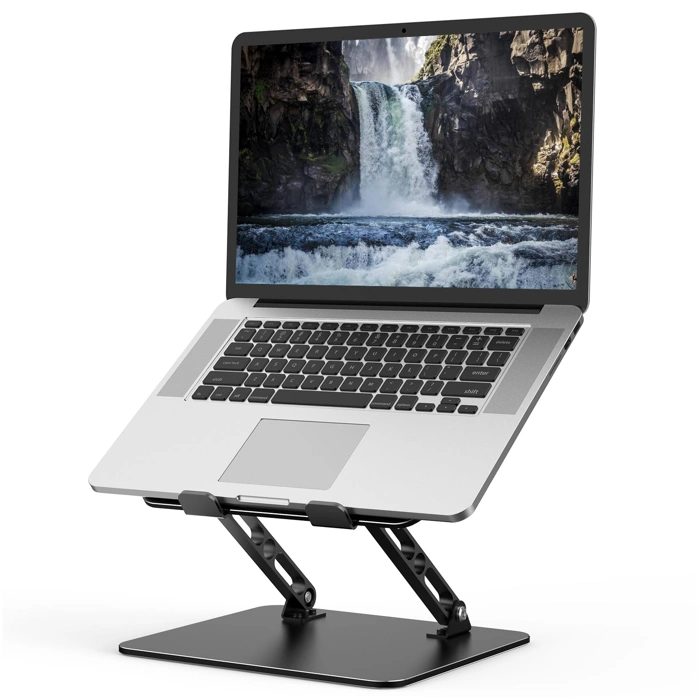
Gogoonike Adjustable Metal Foldable Ventilated Laptop Stand
The Gogoonike Adjustable Metal Foldable Ventilated Laptop Stand offers a budget-friendly way to raise your laptop screen to a more comfortable viewing height. Priced at $14.99 with a 4.6/5 rating, this stand combines adjustability with a ventilated metal design that helps prevent your laptop from overheating during extended work sessions.
The adjustable height mechanism lets you customize the screen elevation to reduce neck strain, which is particularly useful if you're still working on your primary laptop screen or using it as a secondary display. The foldable design makes it easy to collapse and move between rooms - ideal if you split time between a desk, kitchen table, or other spaces in your home office.
The ventilated platform promotes airflow around the laptop base, which can help maintain performance when running demanding applications. The metal construction provides stable support, though you'll still want to ensure your keyboard and mouse are positioned at elbow height on your desk surface to maintain proper wrist alignment.
This stand works best for users who need flexibility in height settings or who occasionally relocate their setup. If you primarily work in one spot and have a dedicated external monitor, a fixed stand may be simpler. But for variable ergonomics on a tight budget, the Gogoonike delivers practical adjustability without complexity.
- ✅ Adjustable height for customizable screen elevation
- ✅ Ventilated metal design helps prevent overheating
- ✅ Foldable and portable for multi-room setups
- ✅ Budget-friendly at $14.99
- ⚠️ Requires separate keyboard and mouse for proper wrist posture
- ⚠️ Fixed stands may offer more stability if you don't need portability
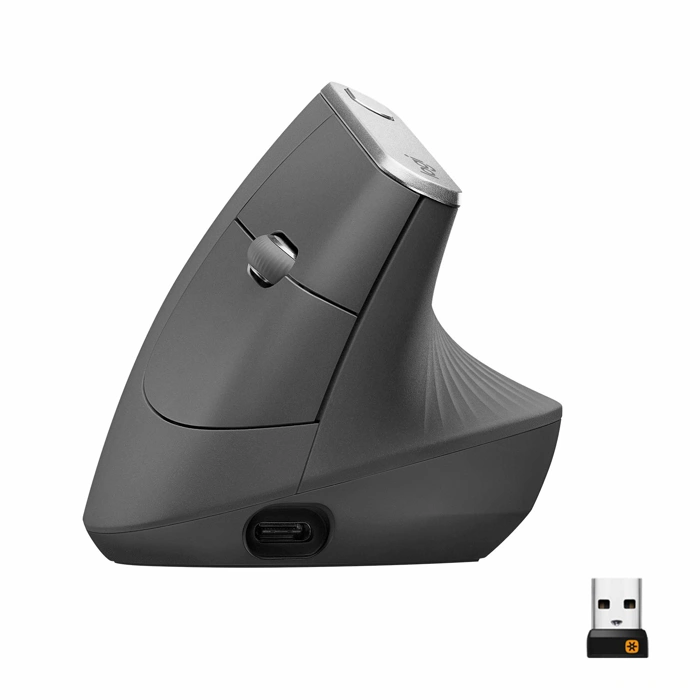
Logitech MX Vertical Ergonomic Wireless Mouse
The Logitech MX Vertical Ergonomic Wireless Mouse is a premium option for users who want to invest in a vertical orientation combined with wireless convenience. Priced at $79.99, it positions the hand in a natural handshake posture - multiple degrees from horizontal - which reduces forearm twisting and may improve comfort during extended use at a laptop workstation.
This mouse connects wirelessly via Bluetooth or the included USB receiver, freeing up desk space from cable clutter and making it easier to reposition your input device as you adjust your ergonomic laptop setup. The 4.3 rating reflects solid user satisfaction, and the sensor provides precision tracking suitable for design work, spreadsheet navigation, or data-intensive tasks that benefit from fine cursor control.
The primary tradeoff is cost. At nearly four times the price of basic vertical mice, the MX Vertical is a meaningful investment. It makes sense for users who spend most of their workday at the computer, value the freedom of wireless connectivity, and want a device built for durability and accuracy. If you're still experimenting with vertical mouse orientation or working within a tight budget, a lower-cost wired model may be a more practical starting point.
The MX Vertical fits well into a complete ergonomic laptop setup checklist by addressing wrist and forearm positioning. Pair it with an external keyboard and monitor at eye level to minimize strain across your neck, shoulders, and arms. The wireless design also supports flexible desk layouts, whether you're using a laptop stand, monitor riser, or sit-stand converter.
- ✅ Wireless connectivity via Bluetooth or USB receiver reduces cable clutter
- ✅ 57-degree vertical orientation reduces forearm twisting
- ✅ Precision tracking suitable for design and data work
- ✅ Solid 4.3 rating reflects user satisfaction
- ⚠️ $79.99 price is significantly higher than basic vertical mice
- ⚠️ May not be cost-effective for users new to vertical mouse orientation
Essential Ergonomic Laptop Setup Checklist
- Elevate laptop screen to eye level using a stand or riser
- Connect external keyboard and position at elbow height
- Add external mouse or vertical mouse to reduce wrist deviation
- Ensure screen is arm's length away (roughly 20 - 26 inches)
- Adjust chair height so feet rest flat and thighs are parallel to floor
- Position frequently used items within easy reach to minimize twisting